
A few months ago, I put together a gallery wall in our living room. Here’s the finished product above. (There’s one empty frame because I can’t decide what to put there, but I kind of like the look of the frame by itself, too). I’ve always wanted a gallery wall and now that it’s up, I love it! You know what they say: Gallery walls are the new TV. Well, okay, no one really says that, but it could be a thing! Whenever people come over, we end up staring and talking about the gallery wall for a good five minutes. Back in October, I wrote about how to pick your artwork for a cohesive collection. Today, I’d like to share my tips for putting it all together, including how to arrange the pieces and hang them.
There are two schools of thought when it comes to arranging gallery walls. The first way is buy all the art now (in a variety of sizes) then play art-hanging Tetris after. The second way is to measure now and buy later. I like the second way because even though it takes a little bit more time upfront, it helps you see how everything will look together and pick art pieces in the right sizes. Here’s how you do it…
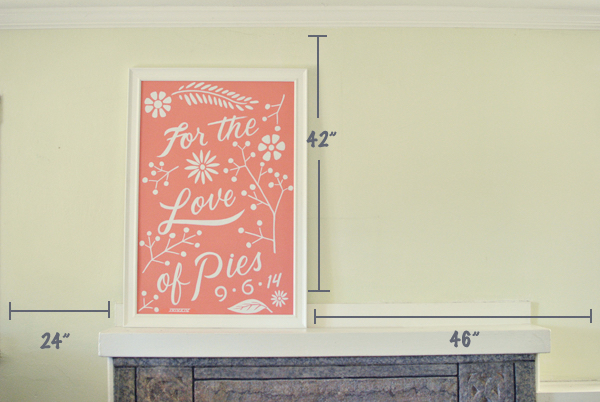
1. Measure your wall space.
Write down your wall specs, then take a picture of the space and open it up in Photoshop. I already had our wedding sign up, so I measured the available wall space around it. (If you don’t have Photoshop, you could also do steps one and two in a blank PowerPoint slide).

2. Find art pieces you like in various sizes.
Take screenshots of each piece (or take a picture of it if you already own it) and place them on your Photoshop artboard. Roughly resize each one relative to your wall space. Move things around to get an idea of where everything will hang or where you might need to add another piece.
3. Get your art ready to hang.
When you’re happy with the way your collection flows and fits in your Photoshop artboard, order and/or frame each piece.
4. Hang your artwork.
Using the layout you created in Photoshop as your guide, hang each piece.

To make it easy, here’s an art-hanging trick I learned from Emily Henderson: Trace each framed piece onto paper and tape it up on the wall. This gives you a general idea of how it will look. Rearrange as necessary until you’re happy as a clam.
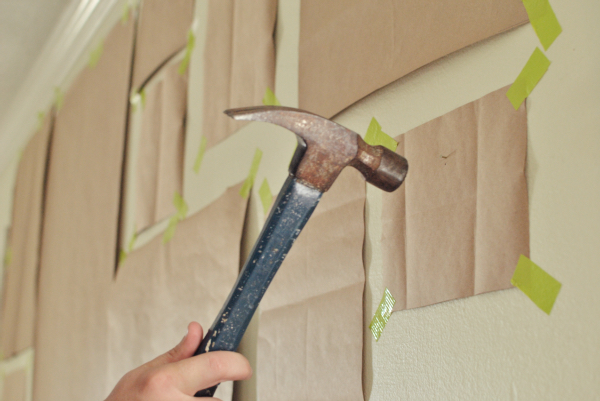
Lightly hammer a nail through each piece of paper.
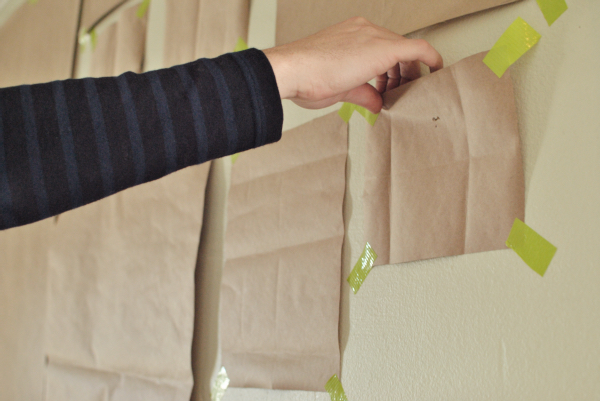
Remove the paper from the wall, leaving the nail in its place.

Hang your picture on the nail.
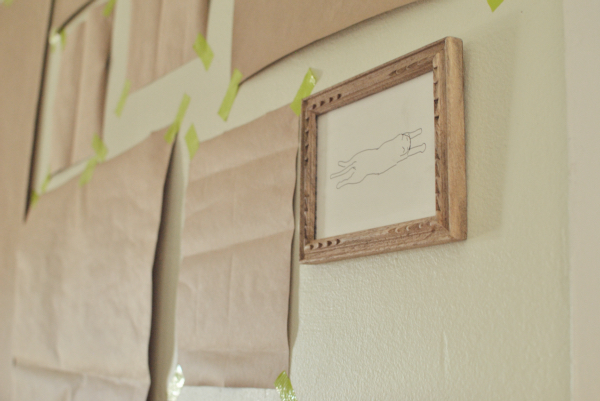
And voila! All your pictures will be hung exactly where you want them.
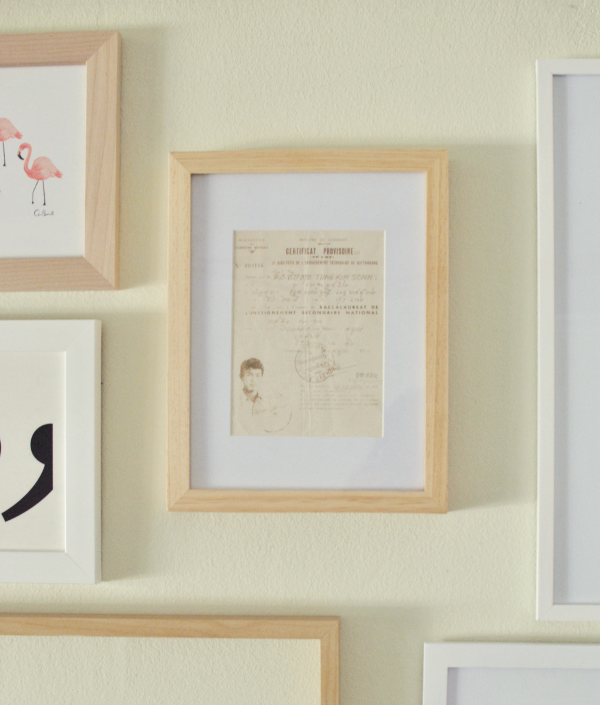

Finally, I thought it’d be fun to sprinkle in some artifacts and mementos to add a personal touch. So I included our big “For the Love of Pies” wedding sign and invitation that our friend Andrew Beach designed and my dad’s Cambodian high school diploma.
Other art pieces include:
Abstract dots
Buffalo
Quotes
Cat
Flamingos
Beach


Looks great! Reminds me of Younghouselove's gallery wall. I loved it. 🙂
Your invitation is so cute!
Wow… Great piece of writing.I'm truly get pleasured from the design and outline of this. It's extremely simple on the eyes which create it a great deal more pleasant for me to move toward here and visit more repeatedly. Outstanding effort!
custom essay writing service
Thanks for sharing Informisan about these also game hacker free download download tweakbox apk mm super patcher Latest version